The rear derailleur is a really cool invention that moves your chain across the rear sprockets of your mountain bike while maintaining proper chain tension with every gear change. This of course is if it is adjusted correctly. If it is even the slightest bit out of adjustment, it can cause a lot of frustration. Learning how to adjust your rear derailleur will not only help you keep your cool, it can also help you save money in the long run.
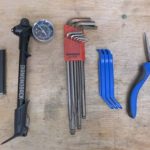
Required Tools
- -Phillips Head Screwdriver
- -2mm Allen Wrench (depending on your rear derailleur)
- -5mm Allen Wrench
- -Rag or Shop Towels
- -WD-40
- -Bike Stand (optional)
Before You Start Adjusting
There are many different models of rear derailleurs but they all share the same basic design principles. This means that they are all adjusted in a similar manner. Before you start adjusting your rear derailleur, it is a good idea to inspect the rear derailleur cable, cable housing, and cable housing caps for damage. You can start by putting your bike in a bike stand if available.
Check the Rear Derailleur Cable
In order to properly inspect the rear derailleur cable, you need to relieve it of its tension. The easiest way to do this is by shifting the rear derailleur up to the largest sprocket. Once on the largest sprocket, you will need to stop the wheel from rotating. Then, downshift multiple times without pedaling as if you were going to shift to the smallest sprocket. The rear derailleur and chain should stay on the largest sprocket and you should see the cable release its tension.
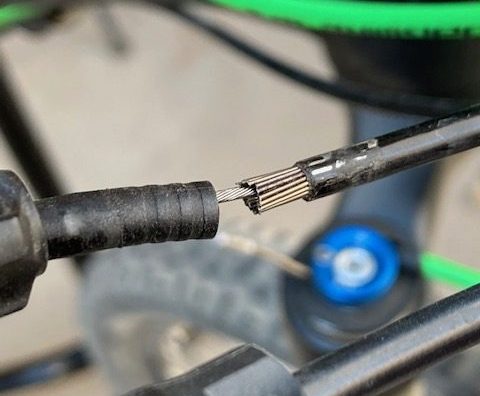
You should now be able to pull the cable housing out of the cable stops to inspect the cable. Be sure to look and see if the cable is frayed or starting to split near the shifter or rear derailleur. You also want to look under the cable housing for rust. If you see either, you will need to replace your rear derailleur cable as this can cause poor shifting.
Check the Derailleur Cable Housing
While the rear derailleur cable is loose, you should also check for problems with the cable housing and the cable housing caps. If the rear derailleur cable is rusty, the inside of the cable housing is going to be damaged as well.
Shifter cable housing has a series of tiny round wires running parallel along the length of the housing. If any of these wires are protruding at either end, the cable housing needs to be replaced as this can cause poor shifting.
Lastly, be sure all of your cable housing caps are intact. If one is cracked or missing, you will need to replace it.
Cable and Derailleur Lubrication
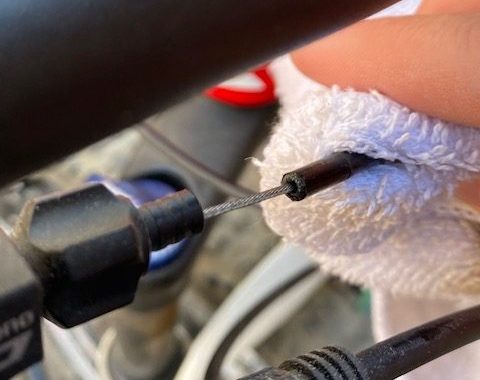
You will need to lubricate the inside of the cable housing before you put tension back on the rear derailleur cable. This can be done by squirting some WD-40 inside the cable housing. Don’t stop until you see it run out the other side of the cable housing. It is a good idea to hold a rag or shop towel near the top of the cable housing to prevent a mess.
Although it doesn’t seem like much, lubricating the inside of the cable housing is an extremely important step. Many will skip over this step when first learning how to adjust a rear derailleur. You may never achieve the crisp-shifting you desire if you don't lubricate your derailleur cable and housing.
Be sure you lubricate both the upper and lower cable housings. Once they are both lubricated, put the ends of the cable housing back into their cable stops and pedal the bicycle. The chain and rear derailleur should shift down to the smallest sprocket, and the cable tension should be tight.
It also doesn’t hurt to spray a little WD-40 on the rear derailleur pivot points and spring.
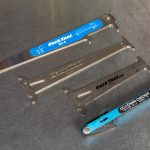
Make Sure the Derailleur Hanger is Straight
Even the slightest bend in a rear derailleur hanger can cause poor shifting. If you try to straighten it without the correct tool will only make things worse. It is important to check if your rear derailleur hanger is bent before adjusting. If you suspect it is bent, it is best to take your bike to your local bike shop as they will have the correct tools and experience to fix it.
Check Chain Wear
Lastly, be sure to check for chain wear before adjusting your rear derailleur. A worn-out chain can cause it to skip over the rear sprockets making it feel like your rear derailleur is out of adjustment. Check out this post to figure out when you need to replace your mountain bike chain.
Adjusting B-Angle
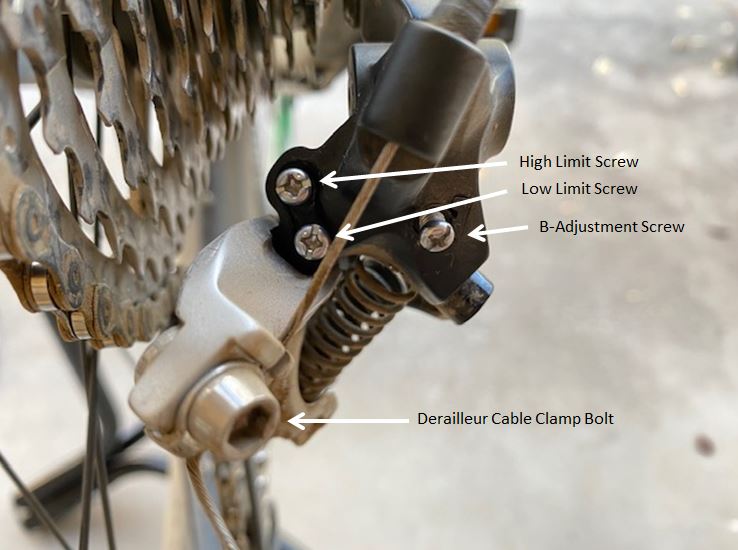
If everything above passes inspection then you are now ready to get into the thick of it. The B-Angle adjustment screw determines how far away the upper jockey wheel is from the largest sprocket. This distance must be set to 5-6mm. Turning the screw clockwise increases the distance between the upper jockey wheel and the sprocket while turning it counter-clockwise moves the upper jockey wheel closer to the sprocket. The closer the upper jockey wheel, the harder shifting becomes. This is because the sharper angle requires more force. If the upper jockey wheel is further than 5-6mm the shifting isn’t as precise.

Setting the Low Limit Screw
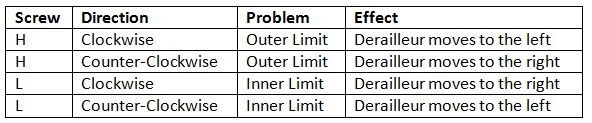
The low limit screw will be identified by a capital L on the rear derailleur. The purpose of the low limit screw is to prevent the chain from shifting off the sprockets and into the frame. To start, shift the chain to the smallest sprocket. You want to make sure the upper jockey wheel is aligned perfectly with the smallest sprocket. If the upper jockey wheel is too far to the right when looking at it from behind, you will need to screw the low limit screw clockwise until aligned. If the upper jockey wheel is too far to the left when looking at it from behind, you will need to screw the low limit screw counter-clockwise until aligned.
Setting the High Limit Screw
The high limit screw will be identified by a Capital H on the rear derailleur. The purpose of the high limit screw is to prevent the chain from shifting off the sprockets and into the rear spokes. To start, shift the chain to the largest sprocket. Again, you want to make sure the upper jockey wheel is aligned perfectly with the largest sprocket. If the upper jockey wheel is too far to the right when looking at it from behind, you will need to screw the high limit screw counter-clockwise until aligned. If the upper jockey wheel is too far to the left when looking at it from behind, you will need to screw the high limit screw clockwise until aligned.
It is important to set both limit screws correctly, but incorrectly setting the high limit screw will cause a lot more damage. Incorrectly setting the high limit screw can cause the rear derailleur to shift into the spokes. If this happens, you run the risk of damaging a lot of expensive parts. It is always a good idea to seek professional help if you aren’t confident in what you are doing when first learning how to adjust your rear derailleur.
Adjust Cable Tension
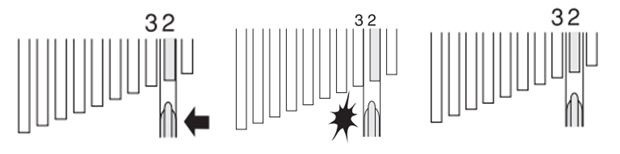
Once the limit screws are set, you need to adjust the cable tension. This is done with an adjusting barrel that can be located on the rear derailleur or at the shifter. Start by shifting the chain to the second sprocket, counting from the smallest sprocket. Turn the adjusting barrel counter-clockwise until you hear the chain rubbing the third sprocket when counting from the smallest sprocket. Once you hear the chain rubbing, turn the adjusting barrel clockwise 5 clicks or until the noise goes away. The upper jockey wheel should now be aligned perfectly with the second sprocket and the cable tension should be set correctly.
If you continue to turn the adjusting barrel counter-clockwise it will eventually unscrew completely. If this happens, the cable tension is too loose to be adjusted with the barrel. You will need to loosen the 5 millimeter Allen bolt and pull the cable through manually. Before you loosen the Allen bolt, be sure to turn the adjusting barrel clockwise back to where you started or you won’t have any room for adjustment. Also, be sure you are on the smallest sprocket before you loosen the 5 millimeter Allen bolt. Once the cable is tightened manually repeat the steps above.

Finishing Touches
Once you’ve adjusted everything you will want to run through all the gears on both the front and rear derailleur to make sure everything is shifting correctly. The last thing you will want to do is lube your chain. Check out this post for a full guide on how to properly lube your chain. As stated above, don't be afraid to seek professional help if you run into problems while learning how to adjust your rear derailleur.
Did you find this article helpful? Feel free to share on social media so others can enjoy it as well!
[DISPLAY_ULTIMATE_SOCIAL_ICONS]